 Save to Pinterest
 The first time I shaped a pretzel, my hands were clumsy and uncertain, twisting the dough rope like I was learning an awkward dance move. My roommate laughed from across the kitchen as I fumbled with the classic pretzel knot, and somehow that moment—flour on my face, dough stuck to my fingers, laughter filling the small apartment—made the whole process feel less intimidating. Now, whenever those golden pretzels come out of the oven, I'm back in that kitchen, feeling that mix of concentration and joy that comes from making something with your hands that looks almost professional but feels completely personal.
I brought a batch to a friend's casual dinner party last spring, expecting them to disappear quietly into the bread basket. Instead, people kept coming back to the pretzels, dunking them in mustard, telling stories about eating them at street fairs and pretzel stands. Watching something I'd made become the unexpected star of the evening was surreal—and honestly, it made me want to master this recipe.
Ingredients
- Bread flour: This has more protein than all-purpose flour, which gives your pretzels that chewiness you're after; don't skimp on this detail because it really does make a difference.
- Active dry yeast: Make sure it's fresh and not expired, and always bloom it in warm water first—that foamy stage is your sign that it's alive and ready to work.
- Warm water: Around 110°F is the sweet spot; too hot kills the yeast, too cold and it won't activate properly, so if you have a thermometer, use it.
- Baking soda bath: This is the secret weapon that gives pretzels their distinctive dark brown exterior and slightly chewy crust; don't skip it or substitute it with anything else.
- Egg wash and coarse salt: The egg wash makes the pretzels gleam, and coarse salt sticks perfectly to them while staying crunchy rather than dissolving into the dough.
Tired of Takeout? 🥡
Get 10 meals you can make faster than delivery arrives. Seriously.
One email. No spam. Unsubscribe anytime.
Instructions
- Bloom Your Yeast:
- Combine warm water, sugar, and yeast in a large bowl and let it sit for about 5 minutes until the surface gets foamy and smells pleasantly yeasty. If it doesn't foam, your yeast is dead and you'll need to start over with fresh yeast.
- Build Your Dough:
- Stir in melted butter and salt, then add flour cup by cup, stirring until a shaggy dough comes together. This isn't the time to overthink it; just keep stirring until the flour is incorporated and you have a rough, slightly sticky mass.
- Knead Until Smooth:
- Turn the dough onto a floured surface and knead for 5–7 minutes, pushing with the heel of your hand, folding it over, and rotating it repeatedly. You'll feel it transform under your hands from slightly rough to smooth and elastic, and that tactile feedback is how you know it's ready.
- First Rise:
- Place the dough in a lightly oiled bowl, cover it with a damp towel or plastic wrap, and let it sit in a warm corner of your kitchen for about 1 hour until it's roughly doubled in size. A warm oven with the light on works great if your kitchen is chilly.
- Prepare Your Setup:
- While the dough rises, preheat your oven to 450°F and line two baking sheets with parchment paper. In a large pot, bring 10 cups of water and baking soda to a rolling boil; the kitchen will smell slightly alkaline, which is exactly right.
- Shape Your Pretzels:
- Punch down the dough gently, divide it into 8 equal pieces, and roll each one into a rope about 20–22 inches long. To shape, form a U with each rope, twist the ends around each other twice, then fold the twisted ends down to create that classic pretzel silhouette.
- The Baking Soda Bath:
- Working one at a time, carefully lower each pretzel into the boiling baking soda bath and let it sit for about 30 seconds, then fish it out with a slotted spatula and set it on your prepared baking sheet. Your kitchen will smell amazing, and you'll watch the pretzels' color deepen slightly even before they hit the oven.
- Egg Wash and Salt:
- Brush each pretzel with the egg wash (beaten egg yolk mixed with water) and sprinkle generously with coarse pretzel salt while the wash is still wet. The salt will stick beautifully and give you that bakery-style crunch.
- Bake Until Golden:
- Pop them into the hot oven for 12–15 minutes until they're deep golden brown with a slightly darker crust. The kitchen will smell like a pretzel stand, and you'll have a hard time not pulling them out early.
- Cool and Serve:
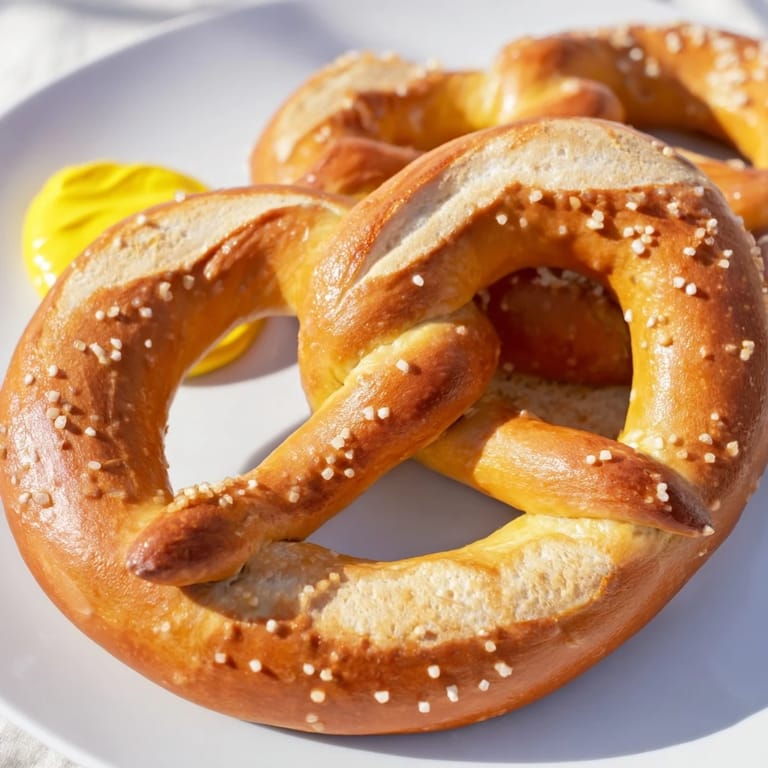
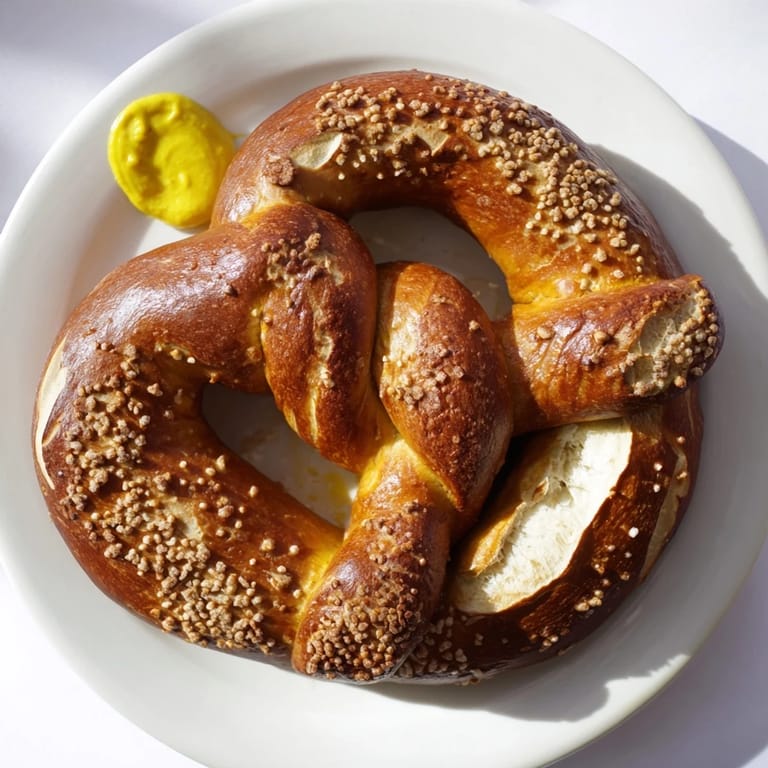
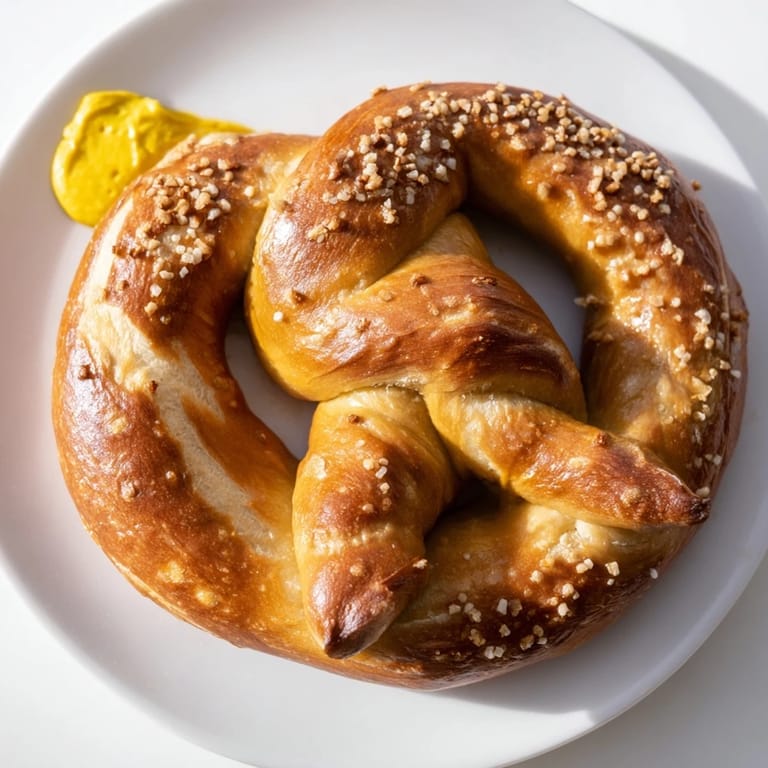
- Let them cool for just a few minutes on a wire rack—they're best served while still warm, with mustard on the side for dipping. Warm pretzels are soft and forgiving; day-old pretzels are still good but develop a firmer crust.
 Save to Pinterest
 There's a quiet satisfaction that comes from pulling a batch of perfectly twisted, deeply golden pretzels out of the oven and knowing you made them from scratch. It's the kind of small kitchen victory that stays with you longer than you'd expect.
Flavor Variations to Try
Once you nail the basic pretzel, the fun begins with toppings and flavor swaps. I've experimented with skipping the salt entirely and brushing warm pretzels with melted butter and cinnamon sugar for a sweet version that tastes almost like a dessert pretzel. Sesame seeds, poppy seeds, or even a sprinkle of everything bagel seasoning also work beautifully and give you something different to offer depending on who's visiting. The dough itself is forgiving enough that these variations feel natural rather than like weird experiments.
Serving and Storage Tips
Warm pretzels are best served within an hour or two of baking, but they keep well in an airtight container for a day and can be gently rewarmed in a 300°F oven for about 5 minutes. For serving, mustard is the classic pairing—yellow, spicy brown, or even whole grain all work—but don't sleep on cheese sauce, honey mustard, or even just soft butter if you're in a more indulgent mood. Leftover pretzels can also be frozen successfully; just wrap them well and reheat them the same way you would day-olds.
Why This Recipe Works
What makes this recipe reliable is that it doesn't require any special equipment or obscure ingredients, just straightforward technique and patience while the dough rises. The baking soda bath is genuinely the moment where everything clicks into place, transforming ordinary shaped dough into something that looks and tastes like it came from a proper bakery. People are always amazed that you made them at home, and honestly, that reaction never gets old.
- Use a kitchen thermometer for the water temperature if you have one—it removes guesswork and gives you consistent results every time.
- If your kitchen is cold, turn your oven on for just a minute or two, then turn it off and let the pretzels rise inside for a gentler, more controlled rise.
- Fresh pretzels are best eaten the day they're made, but they freeze beautifully for up to two weeks if you wrap them tightly.
 Save to Pinterest
 Making soft pretzels at home feels like a small act of generosity toward yourself and anyone lucky enough to eat one warm from your kitchen. Once you've made them once, you'll want to make them again.